
How to TIG Weld: Stainless Steel
TIG Welding Stainless Steel
Stainless steel, with its sleek finish and impressive resistance to corrosion, is a popular choice for everything from kitchen countertops to aerospace components. But this robust metal requires specific tools and techniques. TIG welding is a precise and versatile method that allows you to create strong, beautiful welds on stainless steel. This guide will equip you with the essentials of TIG welding stainless steel

Gathering Your Equipment:
Before you start welding, you need to acquire the necessary equipment:
- A TIG Welder: Look for a DC (Direct Current) arc welder that can supply enough amperage for your project's thickness. Make sure the electrical circuit you're using can supply enough current. 240 volt circuits are generally recommended
- Tungsten Electrode: Lanthanated (Blue) electrodes offer a good balance between stability and ease of use for DC welding operations. Choose the right diameter based on your material thickness and torch set up.
- Shielding Gas: Pure argon is the go-to gas for TIG welding stainless steel. Use an adjustable wrench to connect your gas regulator to the gas cylinder
- Filler Metal: Select a filler rod that matches the type of stainless steel you're working with (e.g., 304L filler rod for 304L stainless steel).
- Safety Gear: Protect yourself with an auto-darkening helmet, welding gloves, steel toe boots, flame-retardant clothing, a respirator/fume extractor.
- Foot Pedal: Optional, but a very useful tool to give you precise control of your amperage (heat)
Now that you have your tools:
- Cleanliness is Everything: Stainless steel is highly susceptible to contamination, so it's very important to clean the weld area using a wire brush, and wipe it with acetone and a rag. Dirt and oils will compromise the weld quality. Contamination will generally appear as dull grey areas on your finished weld.
- Sharpen Your Electrodes: Bring your electrodes to your bench grinder (my preferred method) and sharpen your electrodes to a fine point. Make sure you grind lines are axial (lengthwise) to ensure your arc has an optimal path to your base metal. It can also help to use a fine grinding stone to decrease the size of the grooves.
- Setting Up Your Torch: Install the appropriate size tungsten electrode, cup, collet, diffuser, heat shield, and back cap. Electrodes are typically 1/16 or 3/32 in diameter, and your collet size needs to match it. Welding cups are usually made of Pyrex (glass) or ceramic, and they come in various sizes. The larger the cup size, the more argon you need to supply.
- Grounding: Clamp the ground cable to a clean, bare metal spot on your workpiece or table to complete the electrical circuit.
- Gas Flow: Ensure a steady flow of argon gas to shield the molten metal from oxygen contamination. This prevents discoloration and weakening of the weld. Typically, 25-30 CFH of argon is sufficient, but this depends on your cup size.
- Striking the Arc: Gently scratch the tip of the tungsten electrode on the workpiece to initiate the arc. Your machine may include a high frequency start feature, which will automatically start the arc when you press the foot pedal. Don't touch the tungsten to the molten metal pool, as this will contaminate the weld pool, and your electrode.
- Moving the Torch: Try and maintain a consistent torch angle (around 70-80 degrees) and travel speed. Focus on creating a narrow, focused puddle with even heat applied to both sides of the joint.
- Filler Wire (Optional): If your project requires additional material, dip the filler rod into the weld pool at an angle. Don't push the rod – let the puddle draw the filler metal in.
- Fade Out: When finished, slowly taper off the amperage and allow the weld pool to cool down under the gas flow to ensure integrity of the weld. Hold the torch over the finished weld for around 7 seconds after you finish your weld. The gas will continue flowing and shielding the material after your arc has stopped.
Practice and Patience are Key:
Learning TIG welding takes a lot of time and dedication. Start with scrap pieces of stainless steel to improve your technique before moving on to your actual project. If you're inexperienced you might end up ruining your project. Here are some additional tips:
- Maintain a Clean Electrode: Grind the contaminated tip of the tungsten electrode to maintain a sharp/clean point for a stable arc.
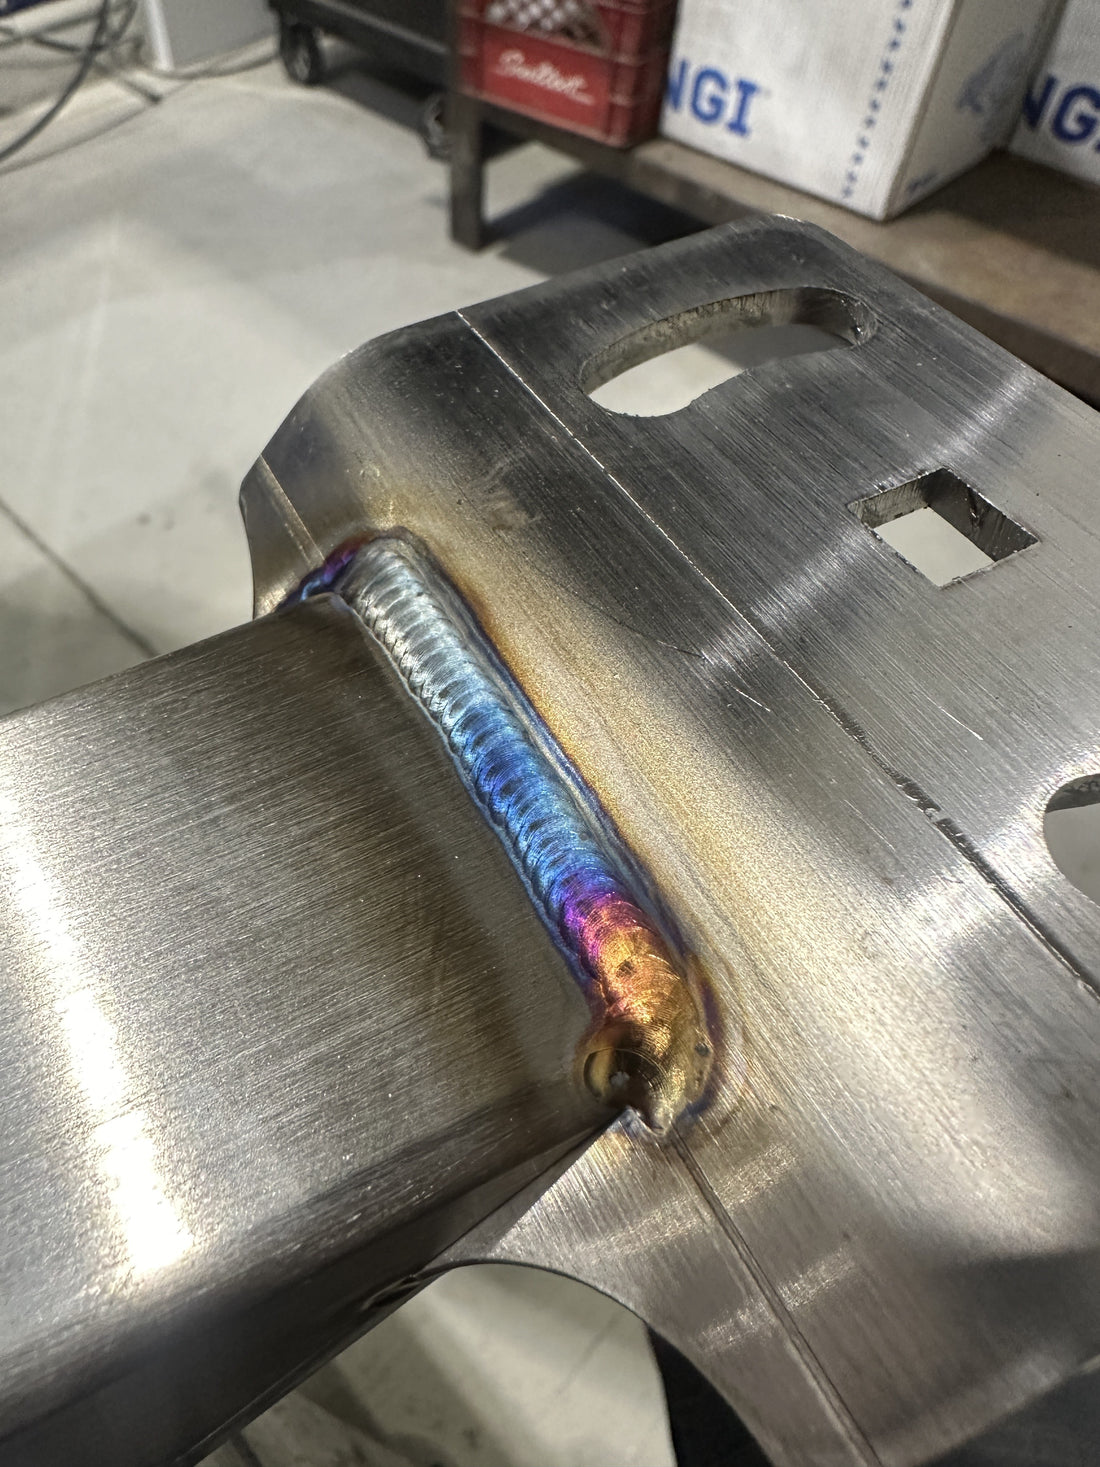
- Watch the Puddle: Observe the weld pool's consistency and color. A clean, silvery/orange pool indicates a good weld. Blue/green can indicate contamination, as well as seeing small artifacts in the puddle.
- Don't Rush: Patience is key. Move the torch steadily and consistently to avoid an uneven or lumpy weld.
With consistent practice, you'll be well on your way to creating beautiful, strong TIG welds on stainless steel. Remember, safety is critical with welding, so prioritize proper gear and ventilation.